GitHub Workflow Integration
The Veracode GitHub Workflow Integration allows you to set up an automated security scanning program for all of your GitHub repositories with a GitHub app.
The integration repository includes the template workflows required for the GitHub Workflow Integration to function correctly. In addition, it includes the configuration file, veracode.yml, which stores the default settings for you to scan your repositories with Veracode.
This document explains the steps required to install the integration, configure Veracode scans, and view your scan results.
Language support
The GitHub Workflow Integration supports scanning repositories written in the following languages:
| Language | Static support | SCA support |
|---|---|---|
| Java | X | X |
| JavaScript | X | X |
| TypeScript | X | X |
| Python | X | X |
| PL/SQL | X | |
| Transact-SQL | X | |
| C# | X | X |
| PHP | X | X |
| Perl | X | |
| Go | X | X |
| Visual Basic 6.0 | X | |
| Apex | X |
For Static Analysis, the GitHub Workflow Integration automatically compiles the repository by default. However, for some applications, you may need to provide specific compilation instructions in the original repository. See the packaging requirements for each language.
For SCA, see the agent-based scan support matrix for additional support details.
Configure the integration
To set up the GitHub Workflow Integration for repositories in your organization, you must download the Veracode app, fork and clone the Veracode integration repository into your organization account, and enable GitHub Actions.
Download the app
- Select the Veracode Workflow App from the GitHub marketplace.
- Select Set up a new plan.
- Select the organization where you want to install the app.
- If you only want Veracode to scan specific repositories, select Only select repositories, and select the repositories that want scanned. If you want to grant Veracode access to scan every repository, select All repositories.
If you select individual repositories, you must fork the Veracode repository into your organization's root folder to enable the Veracode integration.
- Select Install.
Fork the integration repository
You must fork the Veracode repository for the GitHub Workflow Integration into your organization's root folder to enable Veracode scans of specific repositories and customize the behavior of the integration.
- Go to the github-actions-integration repository.
- Fork the repository. See the GitHub Docs for more details on forking repositories.
- Clone the new repository to your organization account, and name the cloned repository
veracode. See the GitHub Docs for more details on cloning forked repositories.
Enable GitHub Actions
Ensure that this repository and the repositories you want to scan have GitHub Actions enabled.
Setting up GitHub secrets for scanning
You must add the appropriate GitHub secrets to this repository to enable the GitHub actions that run when a specified GitHub event is triggered.
Configure Veracode API ID and secret for Static Analysis
If you want to perform Veracode Static Analysis scans of your repositories, you must:
- Generate your Veracode API ID and secret key from the Veracode Platform.
- Configure a GitHub secret in your repository called
VERACODE_API_IDfor your Veracode API ID and another calledVERACODE_API_KEYfor your API secret key.
Configure SCA agent token
Veracode uses the Software Composition Analysis (SCA) agent within your workflows to scan your code.
If you want to perform SCA agent-based scans of your repositories, you must:
- Identify the agent token value for the SCA workspace in which you want your scan results to appear. If you do not know the token, you can regenerate it.
- Configure a GitHub secret in your repository called
VERACODE_AGENT_TOKENfor your token.
How scanning works
In your veracode.yml file, you can customize the behavior of the GitHub Workflow Integration. You can apply several configurations, including:
- The types of scans to run
- Which branches to target
- Which Veracode security policy to apply
- Whether a failure breaks the build
- Whether the scan is triggered by a push or a pull
- The compilation instructions
By default, your veracode.yml file is configured with the following scan triggers:
- Static pipeline scan on any push activity on any branch
- SCA agent-based scan on any push activity on any branch
- Veracode Container Security scan on any push activity on any branch
- Static policy scan with 'break the build' functionality when a pull request is open to your default branch and after code is merged into it
You can configure all of these to fit your own organization's process by editing the veracode.yml file.
View results
After scans of a repository are complete, the Veracode security findings are available in the check for the repository.
To view the findings:
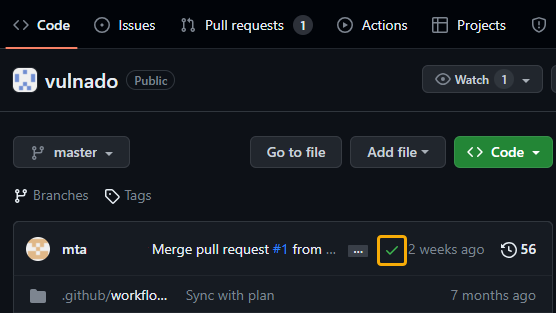
- Open a GitHub repository in which a scan has been completed.
- Select the branch you want to view.
- Select the status icon of the check. The icon can be a green checkmark, a red X, or an orange circle to indicate that the security checks were successful, unsuccessful, or in progress, respectively.
- Select Details.
For scans triggered by a pull request, you can also view the findings on the request.
- Open a GitHub repository in which a scan has been completed.
- Select the Pull Requests tab.
- Select the pull request.
- Select the Checks tab or the Files changed tab. The Files changed tab displays the findings details inline so you can see exactly where in the code the flaw was identified.
Reviewing results
Static Analysis scans return a list of annotations describing each static flaw and a link to the Veracode Platform where you can view a full report of your results. If an application profile for a scanned repository does not already exist in the Veracode Platform, Veracode automatically creates one using the name of the repository as the name of the profile.
For more information on reviewing Static Analysis findings, see Reviewing scan results.
SCA scans return a summary report of your open source security findings as well as a detailed list of libraries, vulnerabilities, and licenses. For more information about SCA findings, see Viewing agent-based scan results.